EDIT: This post originally appeared on the Stash Manicure blog on September 1st. I have edited it slightly and am republishing it here in the event that some of you might have missed it.
115 110 days until what you might ask? Why Christmas, of course!

Now I don’t want you all to get upset with me for the ‘gentle’ reminder, because I’m in the same boat as all of you. Before we know it, we’ll all be scrambling to get our gifts made, wrapped and in most cases sent off to far away places. So today I’m going to share with you not only a great way to use up some of your stash but also how to make some easy, quick and useful gifts.

I don’t know about you but I love charm packs because they give me an overall view of a complete range of fabrics at-a-glance and at a reasonable price. And now there are so many patterns available that are charm pack friendly which makes them even more ‘charming’.
A short time ago, my friend Mary from Quilt Hollow and I did a barter and she gifted me with a charm pack that she herself put together of Jo Morton fabrics from her stash.
 I knew what I wanted to make and had a picture in my head as to what the finished project would look like but when I started out, I didn’t really know how many 5” squares I would need. So, I started with 15 – 5” squares in a variety of colors, prints and values of lights, mediums and darks from my charm pack. In all honesty, with this project, anything goes! The scrappier, the better!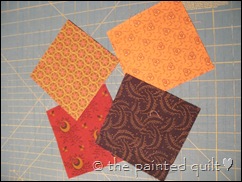
I cut each of the 5” charm squares into three, 1 1/2” strips…
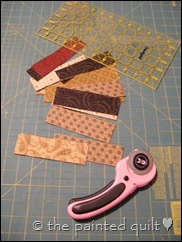
And using a 1/4” seam, then sewed 8 of them together in a row and pressed all the seams in one direction.

As soon as I saw this pieced together, I knew exactly how I wanted my needlecase to look! The strips went together so quickly and the pieces were already cut so I decided to make as many as I could out of the prepared strips! I was able to make four individual units from the 15 charm squares.

I sub-cut each unit into 1 1/2” strips…

Then sewed four of them together length-wise and made sure that the seams in each row were facing in opposite directions to the row above. This allowed the seams to butt up against one another nice and cozy-like, resulting in perfectly aligned squares.
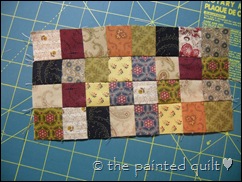
The four original pieced strip units yielded three of the above. If necessary, square off each unit to measure 8 1/2” x 4 1/2”.

Take a piece of scrap batting from your stash and cut 3 rectangles at 8 1/2” x 4 1/2”.

Then do the same with three coordinating pieces of fabric for the inside lining.

Head back to your stash, find another piece of coordinating fabric and cut three pieces at 8 1/2” x 4 1/2”. These will form the inside pockets. Fold each in half lengthwise, wrong sides together and iron.
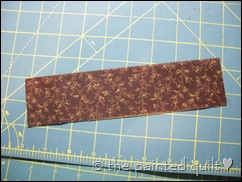 Next, take three scrap pieces of wool or wool felt and square them off to 2 1/2” x 4 1/2”. Iron them in half. Place them on the top right side of the inside lining fabric and machine stitch them down along the center fold line about 3/4” from the top then iron forward. These are to hold your needles and pins.
Layer or sandwich as follows…outside wrong side up, batting then the inside, right side up. Turn the complete unit over so that the outside layer is on top, then machine stitch down the center line to fasten all the layers together.
The needlecase on the top shows the outside and the one below it shows how it will look on the inside.

I always make more than enough binding for whatever project I’m working on for projects like these so I went to my binding stash and hauled out some ready made binding, affixed it all around the perimeter on the outside then hand stitched it down on the inside. If you don’t have any left over binding, just prepare some in the usual manner and bind the needlecase in the same way you’d bind a quilt.

And voila! Three completed needlecases and three fewer Christmas presents that I have to make!

And, if you wanted to make this project even easier, you don’t even have to piece it! You can stop at the stripping part or you can just use a plain piece of fabric for the outside. I’ll leave that part up to you.
Don’t you think they would make great stocking stuffers or little prezzies for your stitching buddies…or even as hostess gifts come holiday time? That’s what I’m going to do with mine!
Edit #2: Since I originally composed this post, I made another needlecase, this time out of selvage scraps that both I and my friends have been saving for me. This was great fun and I have lots left to make more. I made this in exactly the same way as described above only I added 1” to both the length and width to take advantage of some of the neat things that appeared on the selvage ends.
The outside…closed.

The inside…

The outside, face down and open.

Happy stitching!
Kaaren ♥


![cntryflagline[8]](https://blogger.googleusercontent.com/img/b/R29vZ2xl/AVvXsEhGV3BlwW6ewote-KsLOAaCb7HpafcZzcViNUAjwXSWSNCTq-_3x-4LJBi8weR0Wxsw250Q42uCXnmUnwcooqDcYo0EKD-HKtz-h9YrGH892DXx5F-3KJ7Ej9Exh5RA4flOP_IAIi5JA1E/s1600-h/cntryflagline%5B8%5D%5B4%5D.jpg "cntryflagline[8]")
![cntryflagline[8]](https://blogger.googleusercontent.com/img/b/R29vZ2xl/AVvXsEhv0pLtNskffiS3yca4ZKte1Bs2cKvAMo6VkdobJzrOfwrCLeF-jLb6W2zaCfKJe4s_PKsPUL7X8kmcplIXkGX6fVK8hO1yrA_IzNuEWidYT8uJxCOHW__mAyY3BcuQjZKypdInnuqbki8/?imgmax=800 "cntryflagline[8]")


